Ready to create gorgeous Valentine's Day nails without the salon price tag or complicated techniques? This guide shows you how! We'll focus on simple, stunning red nail designs perfect for beginners. Let's get started!
Classic Red with a Heartbeat Accent: Chic and Easy
This design is all about simple elegance—a touch of romance without being over-the-top. It's chic, easy, and perfect for any Valentine's Day celebration.
Prep Your Nails: First, gently push back your cuticles (the skin at the base of your nails). Then, use a gentle nail polish remover to clean your nails, removing any oils or residue. This ensures your polish adheres perfectly and lasts longer. Finish with a base coat (a clear protective layer) to prevent staining.
The Red Base: Apply two thin coats of your favorite vibrant red nail polish, letting each coat dry completely. Avoid rushing this step; patience is key to a flawless finish.
Heartfelt Detail: Using a thin nail art brush (or even a toothpick!), carefully paint a tiny red heart on your ring finger. A small white heart on a red base is also gorgeous! Don't worry about mistakes; nail polish remover on a cotton swab easily fixes them.
Top it Off: Finish with a glossy top coat to protect your design, add shine, and extend the life of your manicure.
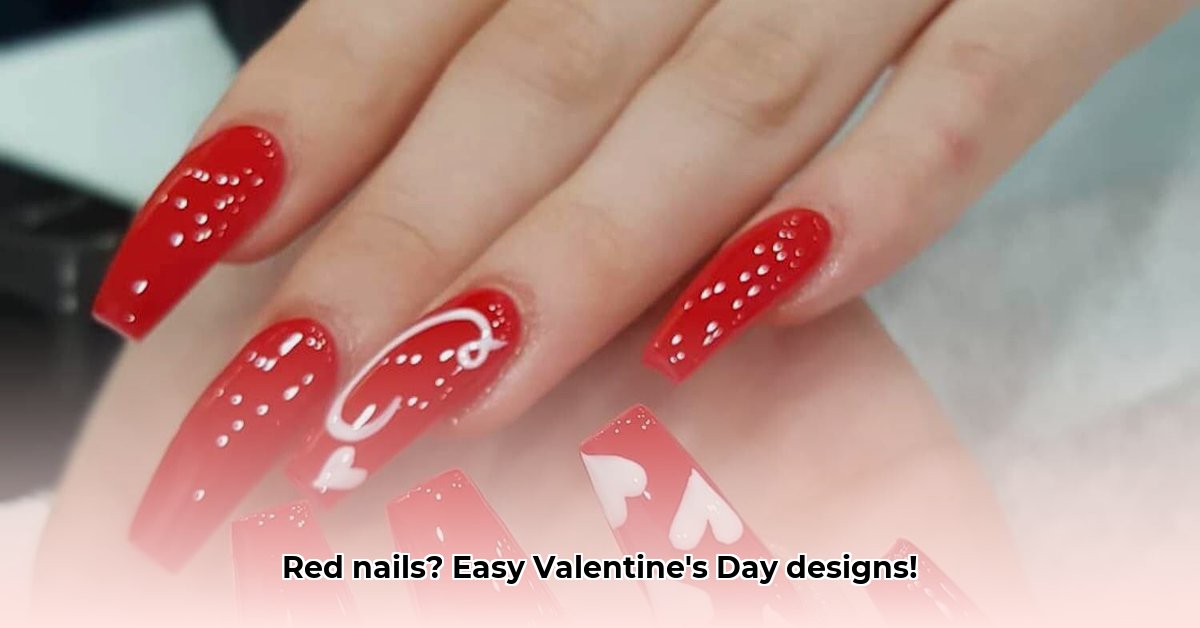
Red and White Heart Tips: Playful and Festive
Want something playful? This design adds a fun, whimsical touch to your Valentine's Day look.
Base Coat Bliss: Start with clean, prepped nails and a base coat.
The Bold Red Base: Apply two thin coats of your favorite bold red nail polish, letting each coat dry completely.
White Heart Tips: Once dry, use white nail polish and a fine brush (or toothpick) to paint small hearts on your nail tips. Uneven hearts add a charming, handmade touch.
Shine Time: Seal your adorable design with a generous top coat for shine and longevity.
Subtle Red Ombre: Sophisticated and Chic
For a sophisticated look, the ombre effect creates a beautiful, subtle color gradient that's both romantic and elegant.
Nail Prep: Begin with clean nails and a base coat.
Red Gradient Magic: Use two shades of red—a lighter and a darker shade. Apply the lighter shade to the base of your nail, blending it upwards into the darker shade at the tips. A makeup sponge works well for a soft blend, or you can use a fine brush.
Protective Top Coat: Once dry, apply a top coat for shine and protection.
Tips for Valentine's Day Nail Success
- Patience Wins: Let each coat dry completely to avoid smudges.
- Right Tools: A thin nail art brush makes detailed designs easier, but toothpicks also work!
- Clean-Up Is Key: Keep nail polish remover and a small brush handy to fix mistakes.
- Practice Makes Perfect: Don't get discouraged! Nail art takes practice.
Your Valentine's Day Nail Kit Essentials
| Item | Description |
|---|---|
| Base coat | Protects nails and improves polish adherence. |
| Red nail polish (2 shades) | Choose shades that complement your skin tone. |
| White nail polish (optional) | For heart details. |
| Thin nail art brush or toothpick | For precise details. |
| Top coat | Protects your manicure and adds shine. |
| Nail polish remover | For fixing mistakes. |
| Cotton swabs | For precise cleanup. |
Remember, the best Valentine's Day nails are the ones you love! Have fun, experiment, and enjoy the process. Happy Valentine's Day!